Customise Almo with Setting Screen
Almo is a simple and affordable Azure DevOps Service addin for effective collaboration and faster work. As a work item management tool, it helps software teams to save time by eliminating duplicate and repetitive tasks.
Almo comes with a pre-defined set of rules and configurations to simplify work item management. Further, you can use the Setting Screen to customise configuration options.
How to Open Setting Screen in Almo
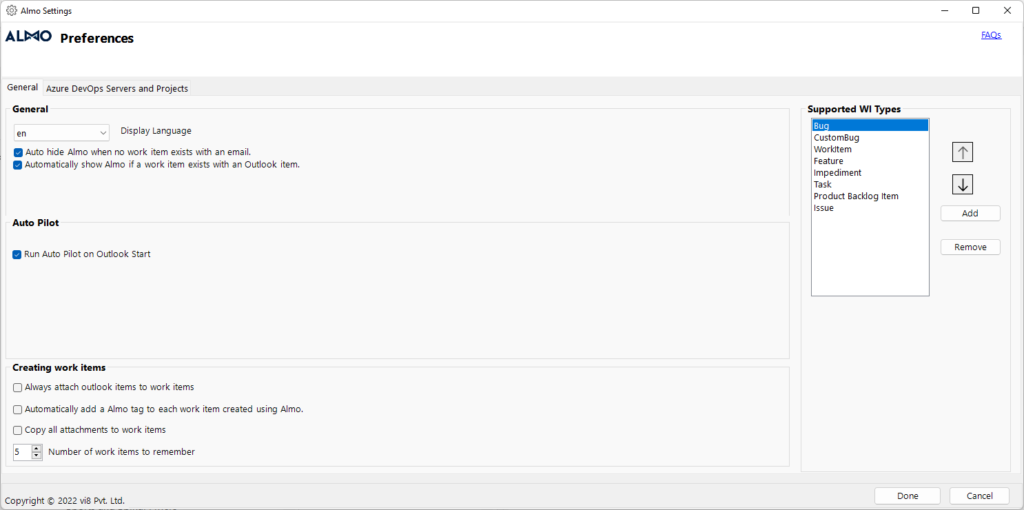
Go to the Almo menu and click ‘Almo Settings.’ This will open the settings window that you can use to set your Almo preferences. You will see two options in the main bar — General and Azure DevOps Server and Projects. Both are explained below.
General

1. General
Use the ‘Display Language’ dropdown menu to select a convenient language. Currently, Almo is available in English, Russian, French and Deutsche.
Next, you will see two checkboxes that you can use to guide Almo’s behaviour towards emails with work items.
- Auto hide Almo when no work item exists with an email – if you check this checkbox and move to an email with no associated work item, the main Almo window will automatically hide.
- Automatically show Almo if a work item exists with an Outlook item – use this checkbox to automatically display Almo when a work item is attached to an Outlook item.
2. Auto Pilot
Auto Pilot is a powerful Almo capability that follows your set of pre-defined rules to automatically create new work items or link the email to an existing work item. In this section of the Setting Screen, you can enable the Auto Pilot engine to start automatically:
- Run Auto Pilot on Outlook start – Almo will run automatically when you start Outlook and process new emails that it missed since the last time Outlook was shut down.
3. Creating Work Items
Use this section to set preferences for work item management. There are three checkboxes in this section along with a number input box.
- Always attach Outlook items to work items – Almo will automatically attach Outlook items to work items.
- Automatically add an Almo tag to each work item created using Almo – All the work items that Almo creates will automatically include a special Almo tag for easy identification.
- Copy all attachments to work items – all attachments included in your Outlook email will be copied to the work item.
- Number of work items to remember – control the number of work items you see as suggestions in the Suggested Work Items menu in the main Almo menu.
4. Supported WI Types
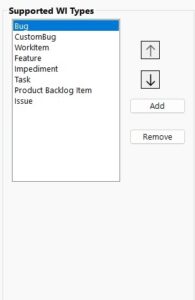
In this section, add any work item type that is unique to your Azure DevOps project or remove the one that you wouldn’t work with. Adding/Removing entries from here controls what you will see when you click the New or Find menu in Almo’s toolbar in Outlook’s ribbon.

Azure DevOps Servers and Projects

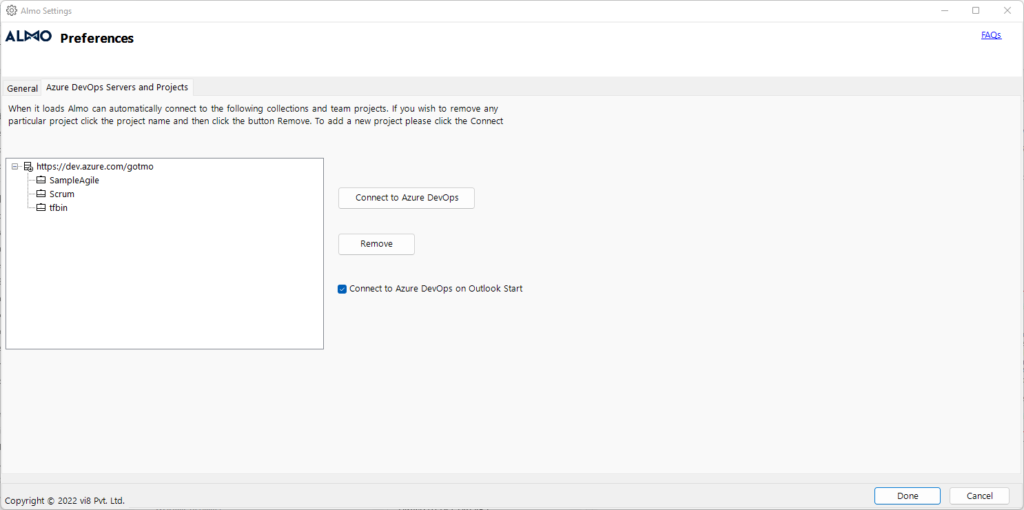
This section enables Almo to connect to Azure DevOps Servers. Check the ‘Connect to Azure DevOps on Outlook Start’ checkbox to run this feature.
When it loads, it lets Almo automatically connect to your existing collections and team projects. To remove any project, select the project name and then click the ‘Remove’ button. Click the ‘Connect to Azure DevOps Service’ button to add a new project.