Automate work item creation with Auto Pilot. This unique feature of Almo completely eliminates manual inputs required to create new work items or update the existing ones.
Using the Auto Pilot function, you can set up a series of rules that Almo will evaluate against incoming emails. When an incoming email matches one of the rules, then depending on the setup of the rules, Almo will either:
- Create a new work item based on Almo Template
- Link the email to an existing work item
Almo’s Auto Pilot Quick Start
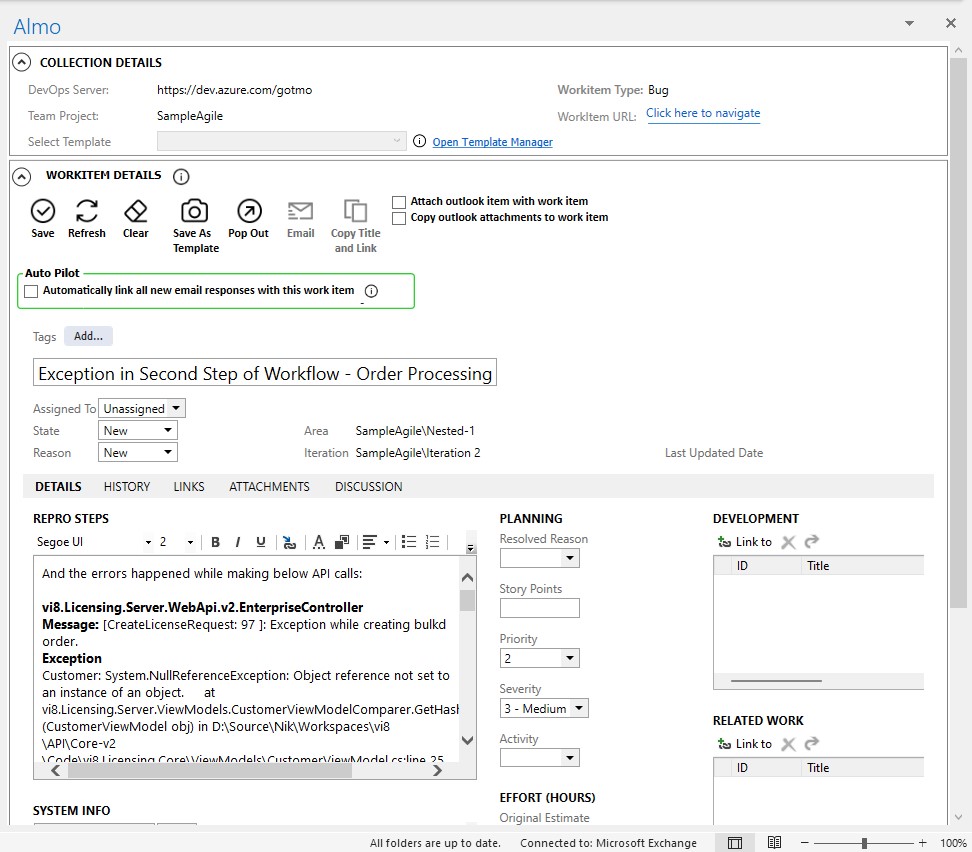
When you create a new work item, you will see a section with the heading ‘Auto Pilot’ on Almo’s work item creation window. Click the checkbox under it, instructing Almo to create an Auto Pilot rule for this work item and then press ‘Save.’ Every reply to this email will automatically be linked to the work item you have just created.

Setting Auto Pilot Rules in Almo
Instruct Almo to automate work item creation by setting rules for its Auto Pilot engine. First, choose ‘Auto Pilot’ from the Almo toolbar to access the dropdown menu. Select the ‘Manage Rules’ option to launch the Auto Pilot Rule editor.

To set up a new rule:
Section 1: General Rule properties, Rule Action

1.1. Press <New Rule> under ‘Rules’
1.2. Enter the Name of this rule
1.3. Go to the ‘On Match’ section to access the dropdown menu. You can instruct Auto Pilot to take either of the two actions:
- Select the ‘Create New’ option to create a new work item using an existing Almo Template
- Select the ‘Link to’ option to link the incoming email to an existing work item. You can also click the ‘Find Existing Workitem’ option to search for existing work items within Azure DevOps.
Section 2: Specify email properties and their values to match
Use this section to define the conditions that an email must meet for this rule.
2.1. Use the ‘Fields’ section to select the element of the email that the Auto Pilot engine should evaluate. Currently, the supported elements are:
From – Sender’s email address
Subject – Subject of the email
To – Recipient(s) email(s), separated by ‘;’
CC – Email address(es) in the CC section of the email, separated by ‘;’
BCC – Email address(es) in the BCC section of the email, separated by ‘;’
2.2. After selecting one of the email elements in 2.1., use the ‘Operator’ section to select the operator that Auto Pilot should use. Currently, the supported operators are:
And –
Or –
Not –
Equals – For a case insensitive exact match of the email element chosen in 2.1 along with the value mentioned in 2.3. The rule evaluates to True when the values are equal.
Not Equals To – For a case insensitive exact match of the email element chosen in 2.1 along with the value mentioned in 2.3. The rule evaluates to True when the values are NOT equal.
Contains – For a case insensitive lookup to determine if the value specified in 2.3 is present in the email property selected in 2.1. For e.g. this will return true in the cases like – “new issue found in the login screen” Contains “issue.”
Not Contains –
2.3. In the ‘Value’ column, add the value that you want the Auto Pilot engine to look for. This is the value which will be matched using the operator specified in 2.2. with the email element specified in 2.1.
2.4. Use the AND/Or column (left of the ‘Fields’ column) to add another clause or exceptions to the rule.
Section 3: Look in folders
Use this section to monitor folders for incoming emails. It is important to be diligent here because if an email is not in one of the specified folders when it arrives, Auto Pilot will not scan it.
3.1 Auto Pilot will look in the default inbox folder. If you have an Outlook rule that moves messages to a different folder(s), you should add it to this list.
3.2 To apply the Auto Pilot rules to outgoing emails as well, check ‘Also also apply this rule to emails I send.’
To save the Auto Pilot rule, click ‘Save.’ You can also Delete or Exit the screen by selecting the buttons associated with them.
This is a crucial part of the Auto Pilot rule’s setup. Incorrect configuration of your folders will affect Auto Pilot causing it to potentially miss emails.
Automatically Created Rules
As explained in Almo’s Auto Pilot Quick Overview, Almo automatically creates a rule for the Auto Pilot engine when you check the Auto Pilot check box while creating a new work item. This rule is also visible in the Rule Editor and will have the suffix [Auto Created] in its name.
Rules created automatically by Almo are immutable. Behind the scenes, Almo uses the “ConversationID” property of the email to track incoming replies. Since ConversationIDs are not really human-readable, Almo displays the rule condition in a read-only text box.
This rule can be manually deleted or disabled.
When does Auto Pilot Run?
When you start Outlook for the first time, the Auto Pilot engine looks for all emails that were received since the last time Outlook was shut down. It does this only in the folders that have been configured in a user’s Auto Pilot rules.
Simultaneously it starts processing “All” new incoming emails in your inbox. This means all such emails whose received timestamp is greater than the time of Outlook launch.
Automate work item creation with Almo’s Auto Pilot engine and eliminate manual labour. Read about Templates and Finding Existing Work Items to leverage all the capabilities of Almo.