Azure DevOps Service vs. GitHub: Making the Right Choice for Your Development Projects

A creative with logos of Azure DevOps Service and GitHub

In today’s fast-paced software development landscape, having the right set of tools can make all the difference in delivering high-quality products efficiently. Two popular version control platforms that developers often consider for continuous integration, and project management are Azure DevOps Service and GitHub.

In this blog, we will:

Compare Azure DevOps Service and GitHub

Discuss how you can automate manual work using Almo

Azure DevOps Service

Azure DevOps Service, offered by Microsoft, is an integrated suite of development tools that aims to enhance collaboration, productivity, and efficiency for development teams. It provides a comprehensive set of features for version control, build automation, release management and project tracking.

Capabilities and Key Features of Azure DevOps Service

Azure DevOps Service supports both Git and Team Foundation Version Control (TFVC), offering flexibility for teams accustomed to different version control systems. With Git, developers can work collaboratively, leveraging features like branches and pull requests to manage code changes effectively. Meanwhile, TFVC offers a centralized version control system, suitable for projects with specific requirements.

The platform’s Continuous Integration and Continuous Deployment (CI/CD) pipelines empower teams to automate the build, test, and deployment processes, resulting in faster delivery cycles and reduced manual errors.

Azure DevOps Service’s robust project management tools facilitate agile planning, backlog management, and progress tracking. Teams can define user stories, tasks, and bugs, all within a single integrated environment.

Benefits of Using Azure DevOps Service

One of the significant advantages of Azure DevOps Service is its seamless integration with other Microsoft products and services. If your organization relies heavily on the Microsoft ecosystem, the tight integration can provide a unified and streamlined development experience.

Furthermore, Azure DevOps Service allows easy scalability, making it suitable for both small and large development teams. The platform also offers extensive reporting and analytics capabilities, providing valuable insights into project health and team performance.

What is GitHub

GitHub is a code hosting platform that allows developers to collaborate on projects and track changes to code. It is a powerful tool for managing code, and it is used by millions of developers around the world.

GitHub gained immense popularity as a web-based hosting service for version control using Git. Acquired by Microsoft in 2018, GitHub remains an independent platform that provides a robust and developer-friendly environment.

Capabilities and Key Features of GitHub

GitHub revolves around Git version control and offers a user-friendly interface that promotes collaboration among developers. It provides a platform for hosting repositories, enabling developers to work on projects collaboratively and manage code changes seamlessly through branches and pull requests.

GitHub Actions, a powerful feature, allows for the creation of custom CI/CD workflows directly within the platform. This feature empowers developers to automate various stages of their development and deployment processes with ease.

Additionally, GitHub offers a range of project management tools, including issue tracking, project boards, and wikis, facilitating effective project planning and communication.

Advantages of Using GitHub

GitHub’s widespread adoption in the open-source community has cultivated a vast and active developer community. As a result, GitHub serves as a hub for discovering, contributing to, and collaborating on countless open-source projects.

The platform’s user-friendly interface and intuitive workflows make it an attractive choice for developers of all skill levels. Whether you’re a seasoned professional or just starting, GitHub’s accessibility fosters a smooth onboarding process.

Comparison: Azure DevOps Service vs. GitHub

Now that we have explored the key features and benefits of both Azure DevOps Service and GitHub, let’s conduct a side-by-side comparison to help you decide which platform best suits your needs.

Development and Version Control

Azure DevOps Service supports both Git and TFVC, offering options for different version control preferences. On the other hand, GitHub is primarily focused on Git version control, leveraging its strengths in distributed version control for collaborative development.

CI/CD (Continuous Integration/Continuous Deployment)

Azure DevOps Service’s CI/CD pipelines provide robust automation capabilities, allowing teams to streamline their build and deployment processes effectively. GitHub’s GitHub Actions offer similar functionalities, enabling developers to define their workflows and automate repetitive tasks seamlessly.

Project Management and Issue Tracking

Azure DevOps Service’s project management tools are well-integrated within the platform, making it a convenient choice for teams that want an all-in-one solution for version control and project tracking. GitHub’s project management features, including issue tracking and project boards, are user-friendly and suitable for open-source projects.

Collaboration and Teamwork

Both platforms excel in promoting collaboration and teamwork. Azure DevOps Service provides several collaboration tools, including dashboards, wikis, and code reviews, while GitHub’s pull request system and community-driven approach foster effective collaboration.

Which is Better, Azure DevOps or GitHub?

The answer to this question largely depends on your specific needs and project requirements. Azure DevOps Service’s seamless integration with Microsoft products makes it a compelling choice for organizations deeply embedded in the Microsoft ecosystem. It excels in offering a comprehensive suite of development tools with extensive reporting capabilities.

On the other hand, GitHub’s popularity in the open-source community and user-friendly interface make it a preferred choice for developers seeking a platform with a strong community presence and an intuitive workflow.

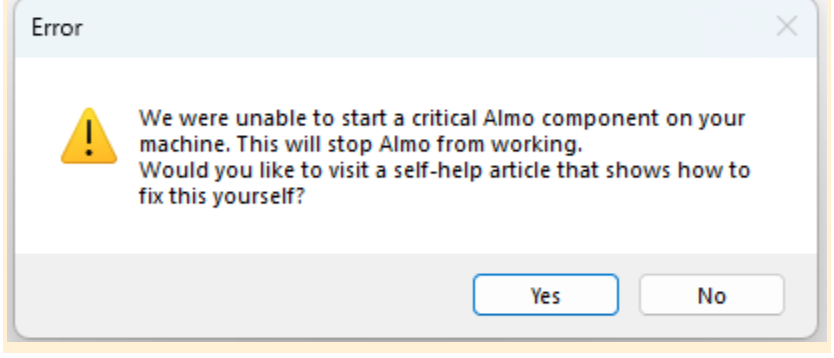
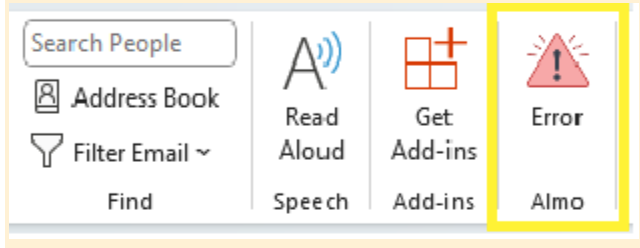
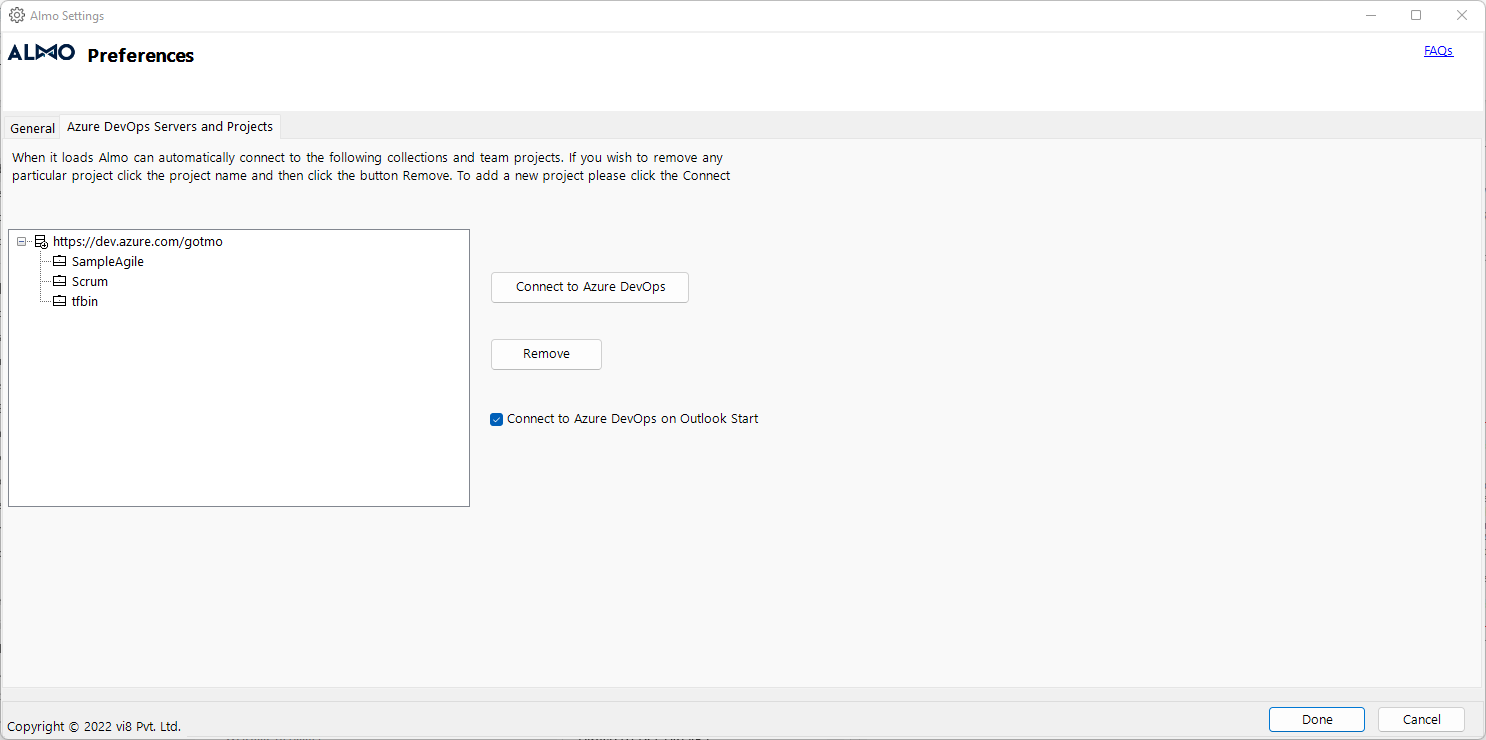
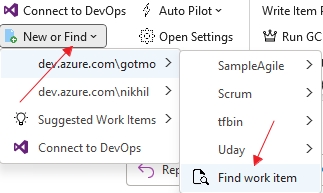
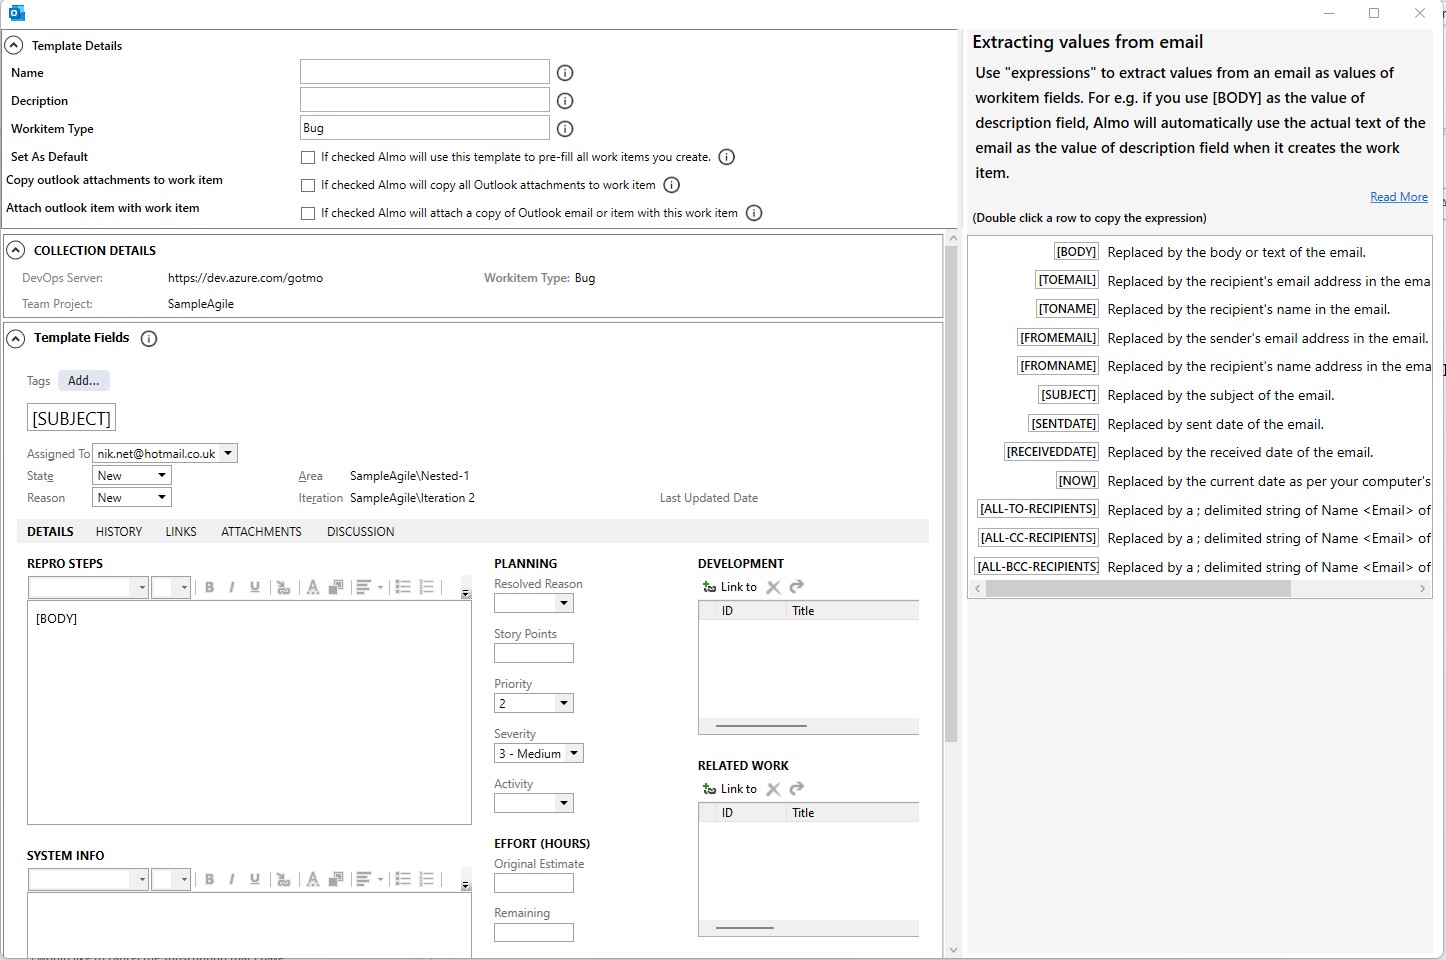
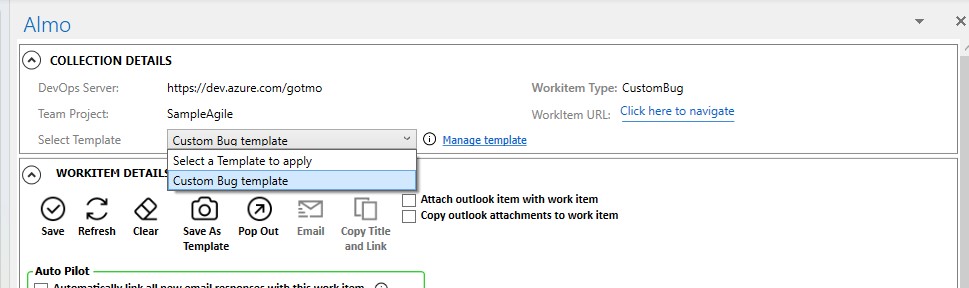
How Can You Use Almo to Improve Efficiency?

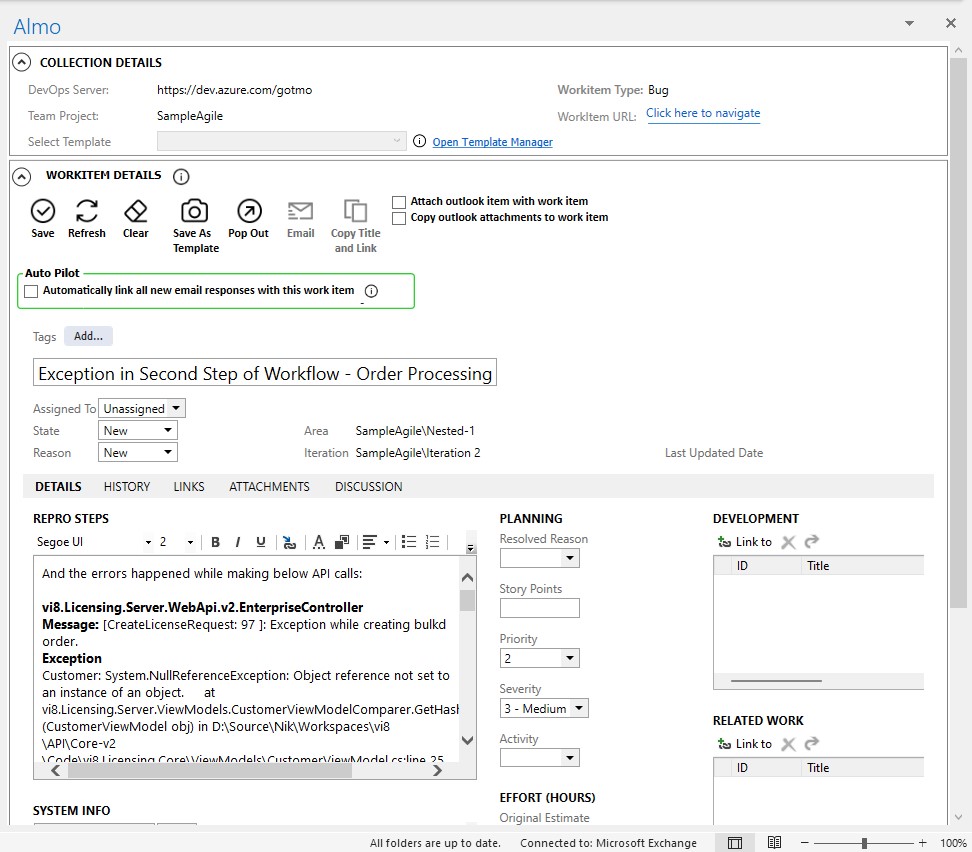
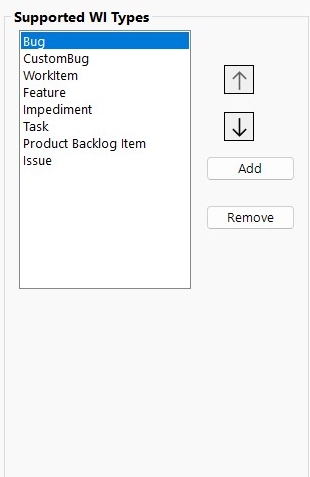
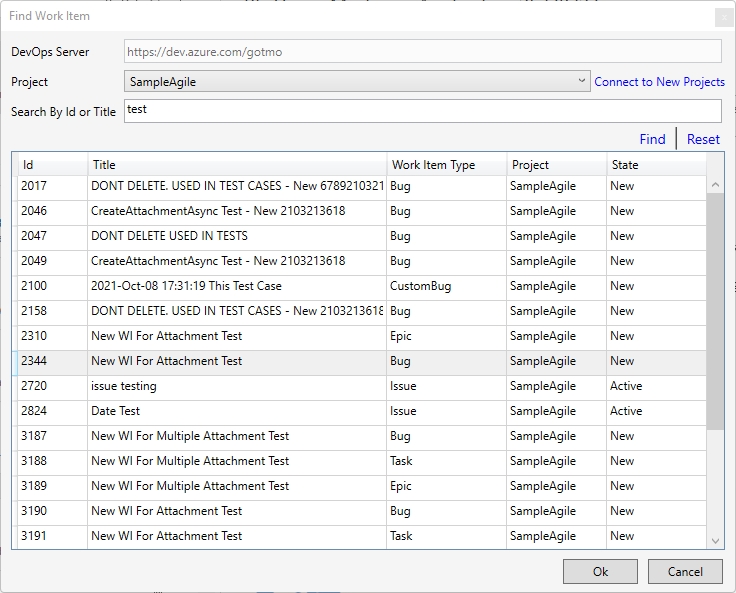
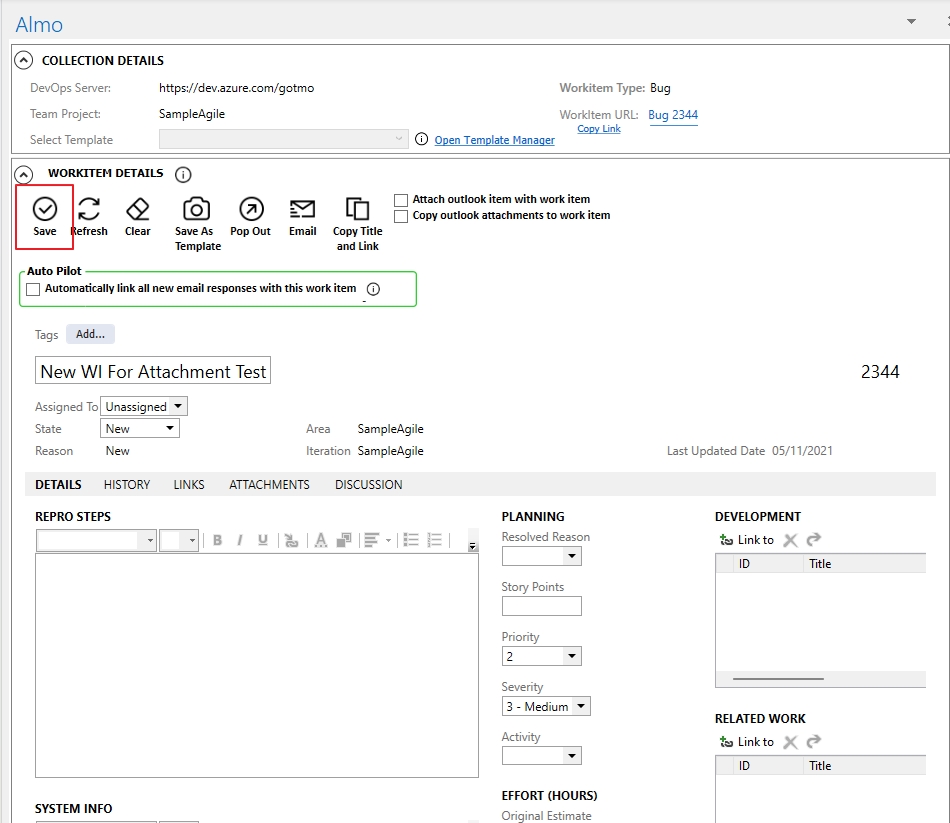
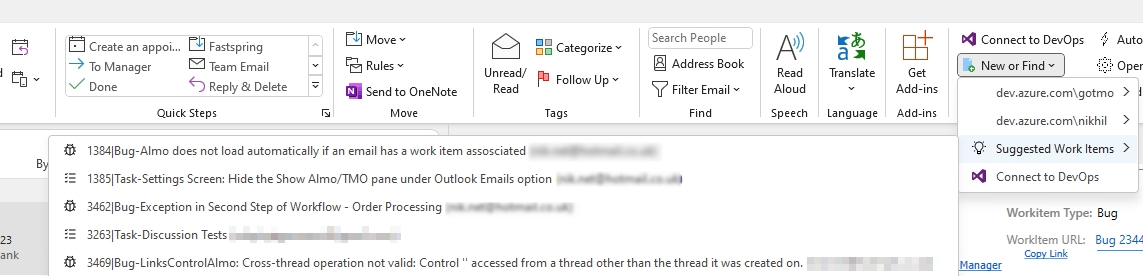
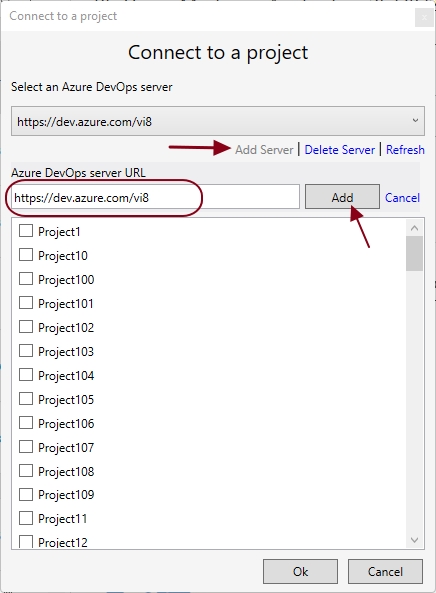
Almo is a single-click addin that seamlessly integrates Microsoft Outlook and Azure DevOps Service. It empowers users to bring work item creation and modification within Microsoft Outlook. Users can effortlessly create new work items, associate them with existing Outlook emails, and fetch real-time updates from Azure DevOps Service. Almo also simplifies finding existing work items.

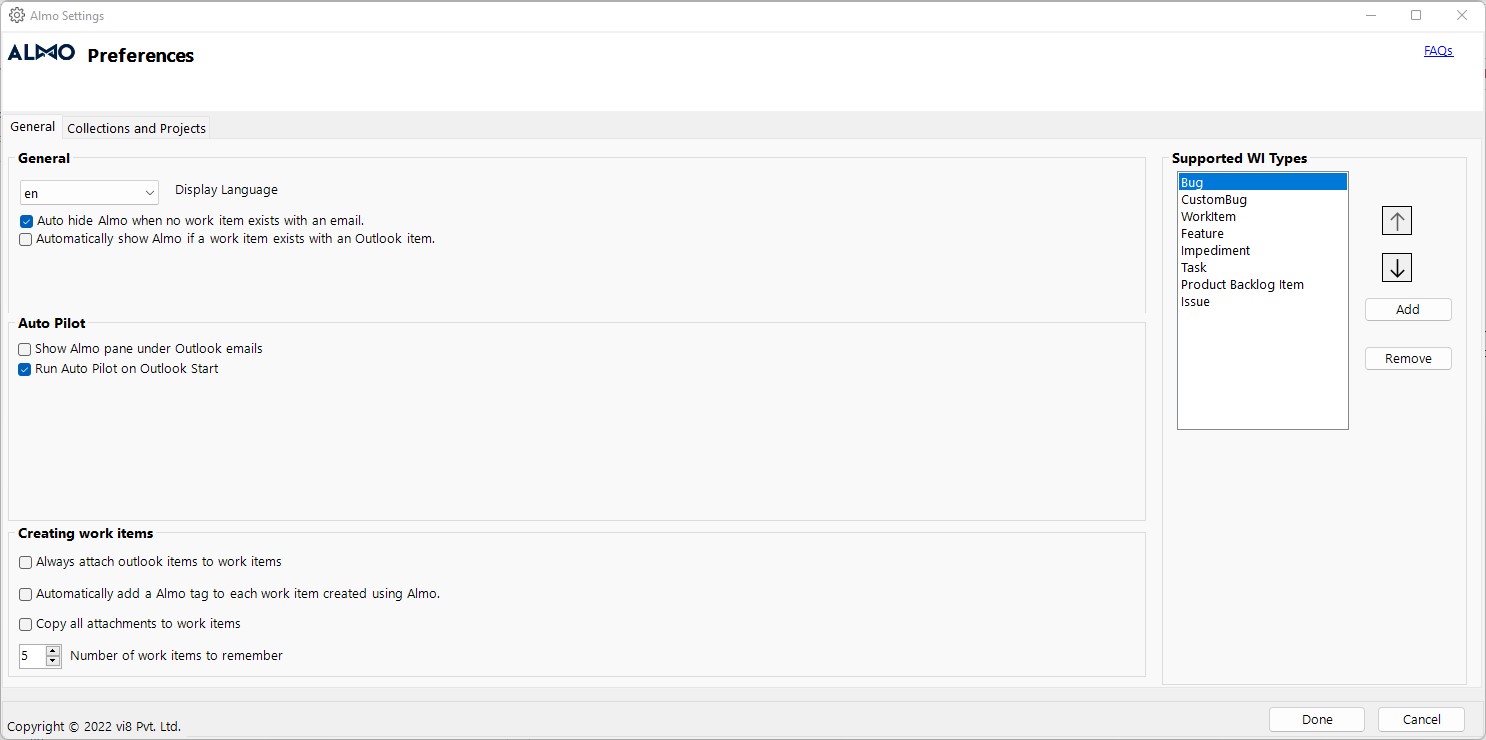
But that’s not all – as an intuitive Microsoft Addin, Almo takes productivity to a whole new level with its powerful automation features. Leverage the Templates and Auto Pilot engines to automate repetitive tasks, freeing up valuable time for more important work.

Conclusion

In conclusion, both Azure DevOps Service and GitHub are powerful platforms that cater to different development needs. Azure DevOps Service offers extensive integration with Microsoft products and robust reporting, making it an excellent choice for organizations immersed in the Microsoft ecosystem. On the other hand, GitHub’s widespread adoption and user-friendly interface attract developers from various backgrounds.

While both Azure DevOps Service and GitHub play integral roles in empowering modern development teams to build, collaborate and deliver exceptional software products. If you are using Azure DevOps Service then you can improve your efficiency by automating work item management using Almo. 

Almo is a one-click addin that reduces your manual labour by 15% and saves you up to 200 hours. You can see it in action without any cost. Download Almo and the first 30 days are on us. Enjoy your free trial!

Efficient Work Item Management with Azure DevOps: A Comprehensive Guide

Effective work item management is crucial for any software development project. Azure DevOps Service, a powerful suite of tools provided by Microsoft, offers a robust solution for managing work items throughout the development lifecycle. In this blog post, we will explore the key features of Azure DevOps and provide practical tips for optimizing work item management. From creating and tracking work items to leveraging automation and collaboration, this guide will help you streamline your development process and enhance productivity. Let’s dive in!

Section 1: Understanding Azure DevOps

Azure DevOps is a cloud-based platform that provides end-to-end software development tools, enabling teams to plan, develop, test, and deliver software efficiently. Its work item management capabilities are centred around three key elements: work items, boards, and backlogs.

# Work items: Work items represent tasks, issues, or requirements within a project. They can be customized to suit your team’s needs, with various types such as user stories, bugs, tasks, and more.

# Boards: Boards in Azure DevOps offer a visual representation of work items. You can create customizable Kanban boards, Scrum boards, or task boards to track the progress of work items and gain visibility into the development process.

# Backlogs: Backlogs provide a prioritized list of work items that need to be completed. They serve as a central repository for capturing and managing requirements, allowing teams to plan their work and schedule iterations effectively.

Section 2: Creating and Tracking Work Items

To effectively manage work items with Azure DevOps, follow these best practices:

# Clear item descriptions: Ensure work items have concise and descriptive titles and descriptions. This helps team members understand the task at hand and prevents ambiguity.

# Categorization: Use appropriate tags, areas, and iterations to categorize work items. This enables easier searching, filtering, and reporting, making it simpler to find and prioritize tasks.

# Establish relationships: Utilize parent-child relationships between work items to represent dependencies or hierarchies. This enables tracking progress at both micro and macro levels, enhancing transparency.

# Assigning and tracking progress: Assign work items to team members and set appropriate effort estimates. Regularly update the status and progress of work items to keep everyone informed and identify potential bottlenecks.

Section 3: Automation and Collaboration

Azure DevOps offers several automation and collaboration features that can streamline work item management:

# Automated workflows: Utilize Azure Pipelines to automate the creation and tracking of work items. For example, you can configure triggers to automatically create a bug work item when a test case fails.

# Integrations: Leverage integrations with popular development tools such as Visual Studio, GitHub, and Jenkins. These integrations allow seamless synchronization of work items, enabling teams to work in their preferred environments.

# Notifications: Configure notifications to keep team members informed about changes to work items. Azure DevOps provides flexible notification settings, allowing users to receive updates via email, Teams, or other channels.

# Real-time collaboration: Azure DevOps supports real-time collaboration, enabling team members to discuss and resolve issues directly within work items. This promotes effective communication and reduces delays caused by back-and-forth conversations.

Section 4: Reporting and Analytics

Azure DevOps provides powerful reporting and analytics capabilities to track project progress and identify areas for improvement:

# Dashboards: Create customized dashboards to display key metrics and charts related to work item management. This allows stakeholders to visualize the progress of work items and make data-driven decisions.

# Query and charting tools: Use Azure DevOps query and charting tools to slice and dice data, analyze trends, and identify bottlenecks or areas requiring attention.

# Burndown charts: Burndown charts provide a visual representation of the work remaining versus time, allowing teams to track progress and adjust their plans accordingly.

Conclusion

Efficient work item management is vital for successful software development projects. With Azure DevOps, you have a powerful suite of tools at your disposal to streamline work item creation, tracking, automation, collaboration, and reporting. By following the best practices outlined in this guide, you can enhance productivity, foster effective collaboration, and deliver high-quality software on time. Start leveraging Azure DevOps with Almo and take your work item management to the next level. Happy coding!

Troubleshoot: Error Message When Launching Almo

Almo’s Background Server

Almo’s CPU and memory-intensive tasks are run by an out-of-process server process that communicates via Almo’s Outlook Client using named pipes on a user’s machine. Almo client periodically interacts with the server to either do Azure DevOps-related operations or for features such as Auto Pilot. When the server is running it will be listed in Windows Task Manager as shown below:

Image of Almo server in Windows Task Manager
Almo server in Windows Task Manager

Potential Issues

However, network or machine administrators may have policies that prevent stand-alone executables from running in the background. Should this happen, Almo’s Outlook client will cease to function and display this warning in the Ribbon and as a user-interactable message.

Almo's Server can fail to launch
Warning message on launching Almo.
Warning sign in Almo ribbon
Warning sign in the Almo ribbon

Almo’s Outlook client is designed to detect the server’s runtime status and attempt to run it if it detects that the server is not running. 

The Almo client refers to registry settings in a specific parent node to identify the location of the server and initiate its execution.

Resolution

You can use these steps to ensure that the right registry settings are in place for Almo’s Outlook Client to launch the server or failing that, launch it manually.

Step 1: Locate the Almo Server

Follow these steps to locate the Almo server on your machine:

– Open File Explorer

– In the address bar, type or copy-paste the following path: “C:\Program Files (x86)\vi8\server\almo\”

– Look for a file named “Vi8.Ipc.Server.Almo.exe” in that location

– Ensure that the server is present in the specified location and that you have the rights to access and launch the exe. It is OK to double click and launch it manually at this stage.

Step 2: Confirm Registry Settings

We need to verify the registry settings to ensure that Almo can detect and run the server. Here’s how you can do it:

– Press the Windows key + R to open the Run dialogue box

– Type “regedit” and press Enter. This will open the Registry Editor

– In the Registry Editor, navigate to the following path: Computer\HKEY_LOCAL_MACHINE\SOFTWARE\WOW6432Node\vi8\Server\Almo

– Confirm that the registry settings in this location match the two data points mentioned below:

            – Key with the name “InstallDir” should have a string value of C:\Program Files (x86)\vi8\server\almo\

            – Key with the name “Name” should have a string value of Vi8.Ipc.Server.Almo.exe

You can also download the registry settings here. Please rename the file to “.reg” and use Window’s registry editor to import them into your registry. Restart Outlook and you should be good to go.

It’s important to bear in mind that Outlook will be running under your user context and Almo’s Outlook client would be running under Outlook as a process. Both Outlook and Almo must be allowed to programmatically read the registry settings so that they can launch the server as needed.

Step 3: Run the Almo Server Manually

If the Almo server is not running or if it was blocked by your network or machine administrators, you can manually start it by following these steps:

– Go to the location C:\Program Files (x86)\vi8\server\almo\ in File Explorer

– Locate the “Vi8.Ipc.Server.Almo.exe” file

– Double-click the “Vi8.Ipc.Server.Almo.exe” file to run the server

Conclusion

By following these steps, you can troubleshoot and resolve the “Unable to Start Critical Almo Component” error in Almo. Ensure that the Almo server is present in the specified location, confirm the registry settings and manually start the server, if needed. These steps should help you get Almo back to its normal function and improve your productivity with its features.

If you have any questions or need additional help, please, don’t hesitate to contact us. We are happy to assist you.

Refresh Your Almo For Outlook License

Almo for Outlook periodically refreshes your license from our servers. This process is non-deterministic to a large extent and happens transparently in the background. However, you might want to force a refresh of the license yourself in some cases.

Should this be the case, please follow these steps:

1. Go to the Almo toolbar in Outlook and click on ‘Open Help.’

“Open Help” option in TMO/Almo toolbar in Outlook.

2. The License Details screen will open. Click on “Check for an updated license” to fetch your latest license from our servers.

'Check for an updated license' in TMO/Almo Open Help screen
‘Check for an updated license’ in TMO/Almo Open Help screen

Do write to us if you need further questions. We are happy to help!

Automate Work Item Creation with Almo’s Auto Pilot

Automate work item creation with Auto Pilot. This unique feature of Almo completely eliminates manual inputs required to create new work items or update the existing ones. 

Zero click work item creation with Auto Pilot in Almo

Using the Auto Pilot function, you can set up a series of rules that Almo will evaluate against incoming emails. When an incoming email matches one of the rules, then depending on the setup of the rules, Almo will either:

  • Create a new work item based on Almo Template
  • Link the email to an existing work item

Almo’s Auto Pilot Quick Start

When you create a new work item, you will see a section with the heading ‘Auto Pilot’ on Almo’s work item creation window.  Click the checkbox under it, instructing Almo to create an Auto Pilot rule for this work item and then press ‘Save.’ Every reply to this email will automatically be linked to the work item you have just created.

Click the checkbox on work item form to quickly create an auto pilot rule that acts on all replies of this email.
Auto Pilot quick start check box on work item form

Setting Auto Pilot Rules in Almo

Instruct Almo to automate work item creation by setting rules for its Auto Pilot engine. First, choose ‘Auto Pilot’ from the Almo toolbar to access the dropdown menu. Select the ‘Manage Rules’ option to launch the Auto Pilot Rule editor.

Click the Manage Auto Pilot menu item to launch the Auto Pilot Rule Editor
Auto Pilot Menu Item to launch the Rule Editor

To set up a new rule:

Section 1: General Rule properties, Rule Action

Use the options in the Auto Pilot rule editor to create various auto pilot rules
Auto Pilot Rule Editor

1.1. Press <New Rule> under ‘Rules’

1.2. Enter the Name of this rule

1.3. Go to the ‘On Match’ section to access the dropdown menu. You can instruct Auto Pilot to take either of the two actions:

  • Select the ‘Create New’ option to create a new work item using an existing Almo Template
  • Select the ‘Link to’ option to link the incoming email to an existing work item. You can also click the ‘Find Existing Workitem’ option to search for existing work items within Azure DevOps.

Section 2: Specify email properties and their values to match

Use this section to define the conditions that an email must meet for this rule.

2.1. Use the ‘Fields’ section to select the element of the email that the Auto Pilot engine should evaluate. Currently, the supported elements are:

From – Sender’s email address

Subject – Subject of the email

To – Recipient(s) email(s),  separated by ‘;’

CC – Email address(es) in the CC section of the email, separated by ‘;’

BCC – Email address(es) in the BCC section of the email,  separated by ‘;’

2.2. After selecting one of the email elements in 2.1., use the ‘Operator’ section to select the operator that Auto Pilot should use. Currently, the supported operators are:

And

Or

Not

Equals – For a case insensitive exact match of the email element chosen in 2.1 along with the value mentioned in 2.3. The rule evaluates to True when the values are equal.

Not Equals To – For a case insensitive exact match of the email element chosen in 2.1 along with the value mentioned in 2.3. The rule evaluates to True when the values are NOT equal.

Contains – For a case insensitive lookup to determine if the value specified in 2.3 is present in the email property selected in 2.1. For e.g. this will return true in the cases like – “new issue found in the login screen” Contains “issue.”

Not Contains – 

2.3. In the ‘Value’ column, add the value that you want the Auto Pilot engine to look for. This is the value which will be matched using the operator specified in 2.2. with the email element specified in 2.1.

2.4. Use the AND/Or column (left of the ‘Fields’ column) to add another clause or exceptions to the rule.

Section 3: Look in folders

Use this section to monitor folders for incoming emails. It is important to be diligent here because if an email is not in one of the specified folders when it arrives, Auto Pilot will not scan it. 

3.1 Auto Pilot will look in the default inbox folder. If you have an Outlook rule that moves messages to a different folder(s), you should add it to this list.

3.2 To apply the Auto Pilot rules to outgoing emails as well, check ‘Also also apply this rule to emails I send.’

To save the Auto Pilot rule, click ‘Save.’ You can also Delete or Exit the screen by selecting the buttons associated with them.


This is a crucial part of the Auto Pilot rule’s setup. Incorrect configuration of your folders will affect Auto Pilot causing it to potentially miss emails.


Automatically Created Rules

As explained in Almo’s Auto Pilot Quick Overview, Almo automatically creates a rule for the Auto Pilot engine when you check the Auto Pilot check box while creating a new work item. This rule is also visible in the Rule Editor and will have the suffix [Auto Created] in its name.

Rules created automatically by Almo are immutable. Behind the scenes, Almo uses the “ConversationID” property of the email to track incoming replies. Since ConversationIDs are not really human-readable, Almo displays the rule condition in a read-only text box. 

This rule can be manually deleted or disabled. 

When does Auto Pilot Run?

When you start Outlook for the first time, the Auto Pilot engine looks for all emails that were received since the last time Outlook was shut down. It does this only in the folders that have been configured in a user’s Auto Pilot rules.

Simultaneously it starts processing “All” new incoming emails in your inbox. This means all such emails whose received timestamp is greater than the time of Outlook launch.

Automate work item creation with Almo’s Auto Pilot engine and eliminate manual labour. Read about Templates and Finding Existing Work Items to leverage all the capabilities of Almo.

Overview of Almo Work Item Form

Almo is a powerful Microsoft Outlook plugin that automates duplicative tasks and saves up to 70 minutes daily. Professionals like software engineers, project managers, QAs, team leads and more use this work item management solution to automate manual work and focus on their core KPIs. 

This post explains the basics of the main window in Almo that enables you to create and update work items from Outlook.

The main work item form in Almo where users create and update work items.

Work with Almo effortlessly by mastering its following key functions:

1. Save: Save your work item or link to your current work item in Microsoft Outlook.

2. Refresh: Pull the latest updates of the work item from the server and show its current state here. 


*Note: Please save the changes before clicking “Refresh” as you may lose them.


3. Clear/Restore/Erase: Use these interchangeable icons to clear, restore or erase the work item description.

4. Save Template: Templates are a great way to remove manual population of work item fields. To know more about Templates, read our blog here. You can choose to create a new Template using the current values in the work item form by clicking this button.

5. Pop-out/Pop-in: For convenience, you can pop out the work item form out of Outlook in a new maximised window. You can then send it back within Outlook should you so desire. Try this. it is pretty cool 🙂

6. Email: This opens a new email window which is pre-populated with the details of the work item that you can share via email.

7. Copy Title and Link: Almo will copy the title and/or link to the clipboard.

Along with these Work Item details, there are two checkboxes that you can use to:

8. Attach outlook item with work item: Almo will add any attachments that are present in the Outlook email to the work item when it is created or updated.

9. Copy Outlook attachments to work item:  Almo will automatically attach a copy of your Outlook email with the work item.

Whether you want to create new work items, find existing work items or link them to Outlook emails, you can do a lot with Almo. 

Recommended Next Reading

We recommend you to check out these quick blogs that will really help you make the most out of Almo, your powerful Microsoft Outlook plugin:

  1. Almo Settings – You can use these settings to control the start up behaviour and more.
  2. Templates in Almo – You can set up Templates, instructing Almo to “automatically populate work item fields.” This removes more manual work! Almo can also extract information from Outlook objects like emails and automatically add it to work item fields.
  3. Auto Pilot in Almo  – You can set up the Auto Pilot engine, telling Almo to automatically create work items when certain conditions are met. That means completely automatic, zero-click work item creation!

Customise Almo with Setting Screen

Almo is a simple and affordable Azure DevOps Service addin for effective collaboration and faster work. As a work item management tool, it helps software teams to save time by eliminating duplicate and repetitive tasks. 

Almo comes with a pre-defined set of rules and configurations to simplify work item management. Further, you can use the Setting Screen to customise configuration options.

How to Open Setting Screen in Almo

Go to the Almo menu and click ‘Almo Settings.’ This will open the settings window that you can use to set your Almo preferences. You will see two options in the main bar — General and Azure DevOps Server and Projects. Both are explained below.

General

Shows the General tab of Almo's settings screen. Here you can customize the behaviour of Almo such as adding or removing custom work item types
General tab of Almo’s settings screen.

1. General 

Use the ‘Display Language’ dropdown menu to select a convenient language. Currently, Almo is available in English, Russian, French and Deutsche.

Next, you will see two checkboxes that you can use to guide Almo’s behaviour towards emails with work items. 

  • Auto hide Almo when no work item exists with an email – if you check this checkbox and move to an email with no associated work item, the main Almo window will automatically hide.
  • Automatically show Almo if a work item exists with an Outlook item – use this checkbox to automatically display Almo when a work item is attached to an Outlook item. 

2. Auto Pilot 

Auto Pilot is a powerful Almo capability that follows your set of pre-defined rules to automatically create new work items or link the email to an existing work item. In this section of the Setting Screen, you can enable the Auto Pilot engine to start automatically: 

  • Run Auto Pilot on Outlook start – Almo will run automatically when you start Outlook and process new emails that it missed since the last time Outlook was shut down.

3. Creating Work Items

Use this section to set preferences for work item management. There are three checkboxes in this section along with a number input box.

  • Always attach Outlook items to work items – Almo will automatically attach Outlook items to work items.
  • Automatically add an Almo tag to each work item created using Almo – All the work items that Almo creates will automatically include a special Almo tag for easy identification.
  • Copy all attachments to work items – all attachments included in your Outlook email will be copied to the work item.
  • Number of work items to remember – control the number of work items you see as suggestions in the Suggested Work Items menu in the main Almo menu.

4. Supported WI Types

In this section, add any work item type that is unique to your Azure DevOps project or remove the one that you wouldn’t work with. Adding/Removing entries from here controls what you will see when you click the New or Find menu in Almo’s toolbar in Outlook’s ribbon.

Add or remove work item types from Almo's menu options using this section
Control what work item types appear in Almo

Azure DevOps Servers and Projects

Shows the Azure DevOps and Projects tab of Almo's settings screen. Here you can instruct Almo to connect with particular Azure DevOps Organisation and projects on startup
Azure DevOps and Projects tab of Almo’s Settings screen

This section enables Almo to connect to Azure DevOps Servers. Check the ‘Connect to Azure DevOps on Outlook Start’ checkbox to run this feature. 

When it loads, it lets Almo automatically connect to your existing collections and team projects. To remove any project, select the project name and then click the ‘Remove’ button. Click the ‘Connect to Azure DevOps Service’ button to add a new project.

Find Existing Work Items in Azure DevOps Service with Almo

As a Microsoft Outlook plugin, Almo does more than create new work items. It simplifies your work by making it easier to find existing work items in Azure DevOps Service. You can use these existing work items with Outlook emails, calendar appointments or tasks.

Find Work Item Using Id or Title

Begin by selecting the email you want to work with and then go to the ALMO toolbar. Select the ‘New or Find’ from Almo’s menu and click ‘Find work item.’

Use Almo's New or Find menu, then the project then
Find work item menu option

A dialogue box will open where you can enter the work item Id or a part of its title in the space opposite ‘Search By Id or Title.’ Click ‘Enter’ or the ‘Find’ button to find the required work item. Almo will show you a list of all the work items with the same Id or title. You can select the work item you want to work with and click ‘Ok.’ Almo will automatically open the details of that work item in Microsoft Outlook.

In Almo use work item id or a part of their title to search for existing work items in Azure DevOps
List of existing work items in Almo

Now, to link the work item to your email without modifying it, click on ‘Save’ under ‘WORK ITEM DETAILS.’

Click Save in Almo main work item form to link the work item with this email or outlook item.
Main work item form in Almo and Outlook

Once the work item is linked, the ‘View and Unlink’ option in the Almo toolbar will become active. Click it and a dropdown menu with the recently saved work item will appear. You can follow the same steps to load it again.

Find Work Items Linked to Conversations

Select the ‘New or Find’ from the Almo toolbar. Next, choose ‘Suggested Work Items’ to see the work items that you have either recently created or worked with using Almo and Microsoft Outlook. This list can also contain work items linked to the emails in your selected conversation (list of threaded emails). In addition, if other work items are linked to any of those emails, Almo will find them and add them under ‘Suggested Work Items.’

Almo can suggest work items by parsing emails and remembering the latest work items that you have created
Suggested work item list in Almo

Connect to More Work Items


Pro Tip: You can also connect to more projects by clicking on ‘Connect to New Projects.’


A dialogue box will open where you can add your server. Click ‘Add’ and Almo will show you a list of projects. Select the one you want to work with by clicking on the check box and then click ‘Add’ at the bottom of the dialogue box.

Finding work items can be a strenuous task when done manually. Scouring through emails is a time-consuming process. With Almo, you can find all the related work items in just a few clicks. Try it today and save precious hours every day.

Quick Start Guide to Almo

Almo is a single Microsoft Outlook addin that connects with Azure DevOps and helps in easy work item creation and management. It automates repetitive tasks and enables you to reduce manual labour by 15%.

Ready for a more efficient way of working? Download Almo and start using it in just three steps:

Add Work Item Types to Almo Settings

To create a work item, go to the Almo toolbar and select ‘Open Settings.’ A dialogue box will open with a list of work item types you can work with. You can also add new work item types by clicking ‘Add’ and/or delete the existing ones by selecting the ‘Remove’ option. 

This screen shows various settings in Almo that a user can set. A user can specify what work item types they want to work with on this screen.
Almo’s Settings screen with various options to customize Almo’s operations.

Connect to an Azure DevOps Server

Click “Connect to DevOps” button in the Almo menu. 

Click the connect to devops button to connect to an Azure DevOps Service organisation
Connect to DevOps enables connection to Azure DevOps


In the next screen, click “Add Server”, enter the server URL and press ‘Add.’ Once the authentication is complete, Almo will display a list of alphabetically-sorted projects. Check the project(s) you want to work with and click ‘Ok.’

Use the Almo's Add New Server Window to add the Azure DevOps Organisation you want to connect to then select the projects you want to work with
Connect to Azure DevOps Organisation and projects

Create and Save a Work Item

Click on the email that you want to associate with a work item and then select the ‘New or Find’ option from the Almo toolbar. This will open a dropdown menu containing the work item type. You can also select existing work items.

Use the New or Find menu to create a new work item type from Outlook using Almo.
Select a project and work item type using New of Find menu

Select the work item type and Almo will pick up important information from the email and pre-populate fields in the work item type.

The main work item form shows all the Azure Devops fields you can populate using Almo and Outlook
Main work item form renders in Outlook


Pro tip: you can modify this behaviour by using Templates.


Finally, click ‘Save’ and Almo will create the work item. 

Almo will automatically attach a copy of the email and other related attachments to the work item it creates. You can load the work item again in Microsoft Outlook and track all the updates.

Templates Remove Manual Data Entry in Work Item Fields

Templates take away the manual entry of work item fields when you create them. Consider them as the blueprints that automatically populate fields in work items from a group of default values you set when you create a Template. 

With Templates, Almo can also automatically extract the correct information from Outlook objects, add that to the work item fields automatically and thus save hours of manual work. You do this by using Expressions in Templates which then instruct Almo to extract data from Outlook objects (email, calendar meetings or tasks) and use those values to fill the work item fields.

Video Walk Through

Here is a video walk through of creating and using Templates:

Creating Template Using Template Manager

Go to the Almo menu and open the ‘Template Manager’ at the top-left corner of your screen. Before creating a Template, Almo will prompt you to connect to a server if you have not done that yet. 

Click Template Manager button in Almo's menu to open the Template manager
Template manager button opens template manager

In the Template Manager dialogue box, select ‘Add New Template’ to access the dropdown menu and then select a project and a work item type for which you are creating this Template. This will open the Template editor that you can use to set your Template rules. 

Click Add New Template button to start creating a new template
Add new template button starts new template


Pro Tip: You can create multiple Templates for each work item type.


Adding details to the Template editor

The screenshot below shows how the blank template editor might appear. Since the Template Editor uses your Azure DevOps Service’s setup to render the work item form, your view of tempalte editor might appear different than the view shown here. However the basic sections in “Template Details” will be the same.

Template editor enables you to specify default values of work item fields including the ability to extract values from Outlook objects
A generic view of the template editor

1. Template Details

Begin by adding Template details like name and description. You will also see a few checkboxes with different functions in the editor. Select one or more per your preference. Here is what they do:

Checkbox 1: Set As Default — Almo will automatically use these Template details whenever you create the specified work item type.

Checkbox 2: Copy Outlook attachments to work item — Almo will take any attachments that are present in the Outlook email and attach them to the work item when it is created

Checkbox 3: Attach Outlook item with work item — Almo will automatically attach a copy of your Outlook email with the work item when it is created.

2. Expressions

Use Expressions to take various properties of an Outlook object like email, calendar or task to populate multiple fields in the work items. These properties could be email subjects, time stamps, receivers’ addresses and more. 

Expressions Description
[TOEMAIL] Almo will replace this with recipient’s email address in the Outlook email.
[TONAME] Almo will replace this with recipient’s name in the Outlook email.
[BODY] Almo will replace this with the body or text of the Outlook email.
[FROMEMAIL] Almo will replace this with sender’s email address in the Outlook email.
[FROMNAME] Almo will replace this with sender’s name in the Outlook email.
[SUBJECT] Almo will replace this with the subject of the Outlook email.
[SENTDATE] Almo will replace this with the sent date of the Outlook email.
[NOW] Almo will replace this with the current date as per your computer’s calendar.
[RECEIVEDDATE] Almo will replace this with the received date of the Outlook email.


Select an Expression from the list and assign one or more fields in the Template (further explained in the next step). 

3. Template Fields

The fields in the template are rendered as they would appear in the work item on Azure DevOps Service. Almo will paint this section as per the setup of your work item type and thus it might look different than the generic screenshot below.

Use this section to add further details to the Template you want to create. For example, use the ‘Subject’ box for the title of the work item. You can also select an Expression to populate the fields, such as the [Subject] of the email. For this, double-click the Expression and paste it into one of the Template fields.

Once you have set all the rules for the work item type, scroll down and click ‘Save.’

Creating Template While Creating Work Items

One of the easiest and quickest ways of creating a Template is while creating a new work item. First, follow the usual steps for creating a new work item:

Click the ‘New or Find’ option in the Almo toolbar > select the work item type

To save Template rules, instead of clicking ‘Save,’ click ‘Save As Template.’ This will open the Template editor where you can fill in additional details and save this Template. 

More on Almo Templates

Setting a Template as Default

For convenience, you can set a Template as default. This will instruct Almo to automatically use the default Template to pre-fill the values every time you create a new work item of that type. 

Filter Templates

If you have more than one template for the same work item type, you can use the combo box to choose the right one
Select the right template you’d like to use

If you have more than one Template for a work item type, use the ‘Select Template’ option to filter the Templates. 

Managing Templates

Use the Template Manager to manage your Templates, including adding new Templates, setting an existing Template as the Default Template and deleting Templates.

You can access the Template Manager from the Almo toolbar.

Contact Us